 tháng 6 04, 2010
This is the project we will be working on today. It is called a "Scallop Square Box". Items used are:
- Cardstock: Pixie Pink, Sahara Sand, & Whisper White
- Island Oasis Designer Series Paper
- Scallop Trim Border Punch
- Scallop Oval Punch
- Large Oval Punch
- Scallop Square Die
- Big Shot
- Island Floral Bigz Die
- Perfect Polka Dots Impressions Folder
- Oval All Stamp Set
- Bitty Buttons
- Itty Bitty Shapes Punch Pack
- Glue Dots
- Stampin' Dimensionals
- Old Olive Ink

 *Now you will need to cut three strips of cardstock:
 - 2 strips that are 2" x 4", score three sides at 1" leaving a short side un-scored1 strip that is 2" x 3'5", score the two long sides at 1"

*Snip off the two corners where your scores lines meet on both pieces of cardstock that are 4" long.
 *Using your bone folder, fold all three sides of all three cardstock pieces to create clean folds.
*Add "Sticky Strip" to your 3 pieces being careful to run the tape to the outside edges.
 *Using the shortest piece, place the 2 other pieces on each side and adhere the short sides only. The picture below shows what your 3-sided strip should look like:
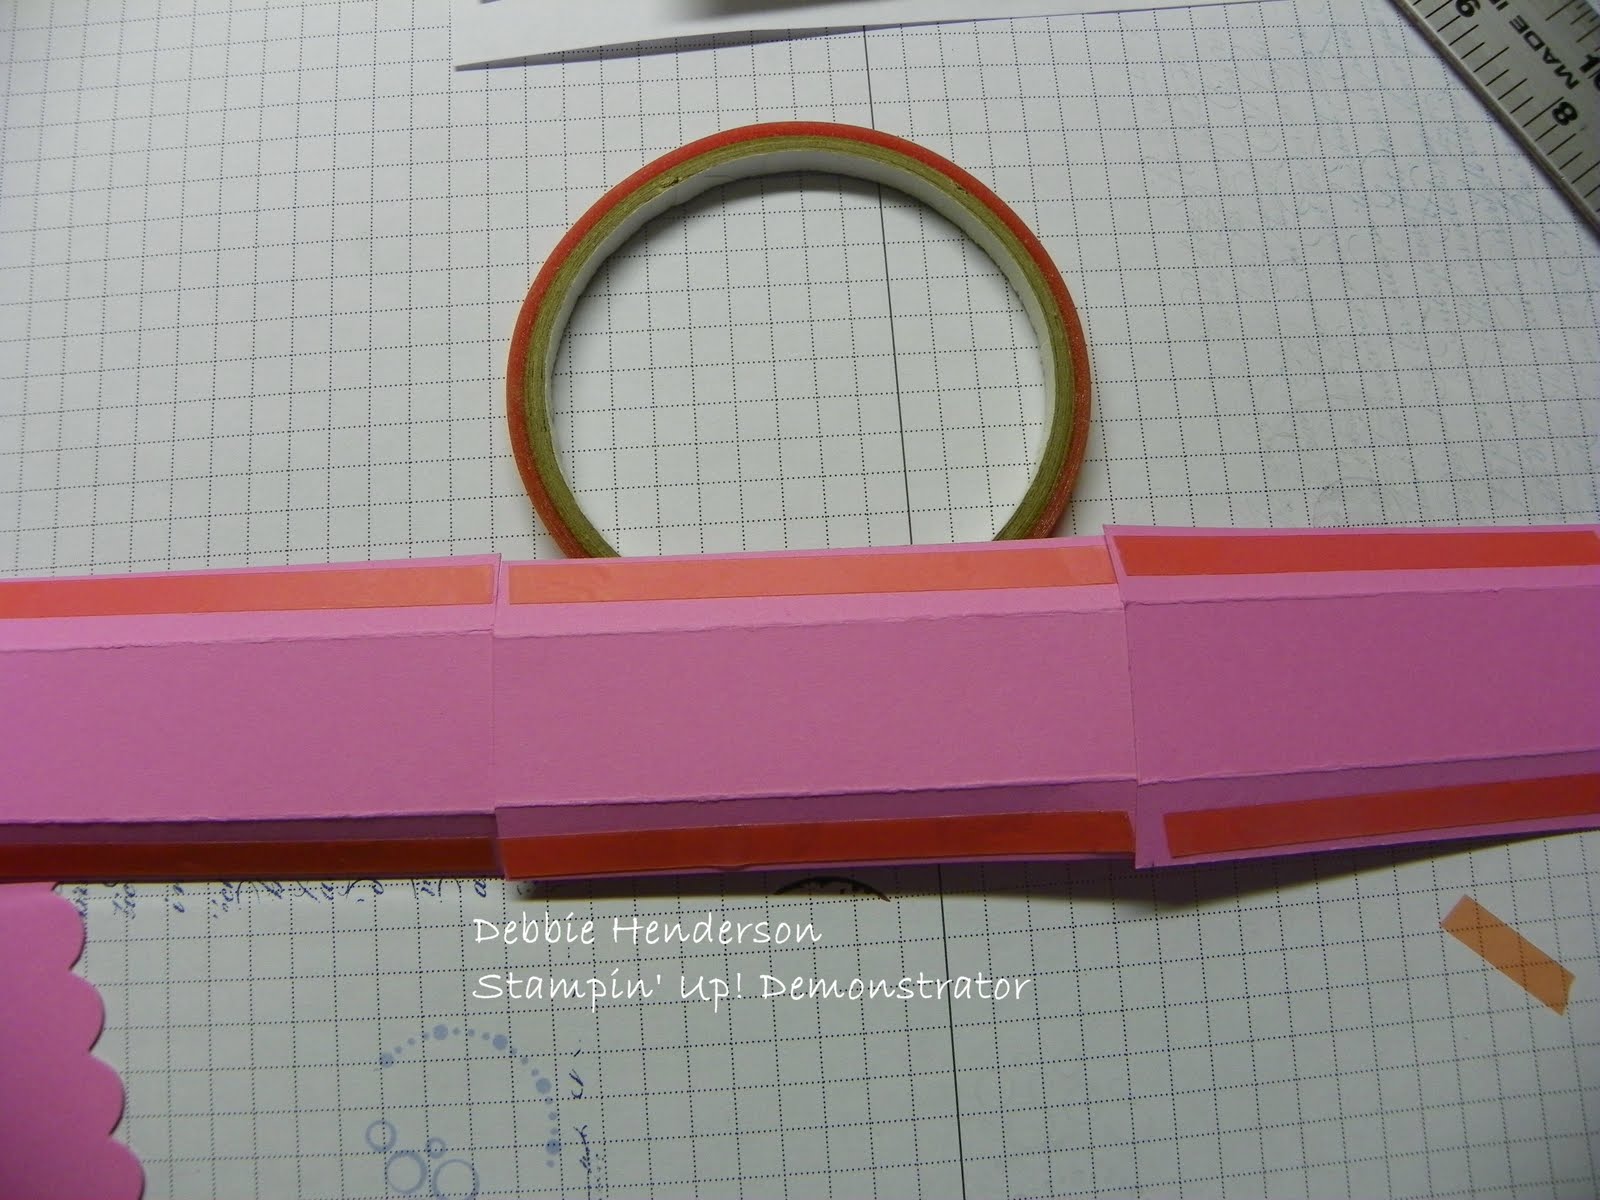
*Remove the "Sticky Strip" from the middle section only and fold the other 2 section over on top of the middle section. The corners should meet and stick together as shown:

*Remove the sticky strip protector strips and adhere the the scallop square to create the backside of your box. Add your second scallop making sure you carefully align your scallops with the first square so that the box will stand up straight.

 *And this is the box laying down:
 *Now we are ready to add layers. The second layer is created with "Sahara Sand" cardstock and cut at 4" x 4". Glue to your box layer.
 *The third layer is cut at 3.5" x 3.5" in "Whisper White" cardstock. Adhere to layer #2.

*For the 4th layer, I used the Designer Series Paper from the "Summer Mini" called "Island Oasis". I sized it at 3.25" x 3.25" and using the Scallop Trim Border Punch, punch all 4 corners of your Designer Series Paper.

*Glue to your 3rd layer.
 *Now we will be creating the flowers and leaves below to decorate our box front:
 *For the flowers and leaves I used the "Stampin' Up! Island Floral Bigz Die"-Item #118871 available in the "Summer Mini Catalog". Once I had all of my images cut out using scrap pieces of cardstock (3 flowers & 2 leaves), I ran them all through the "Big Shot" using the "Perfect Polka Dots Impressions Folder".

*Glue them all in place using "Mini Glue Dots".

*This is what your box should look like from above:
 *And this is the box laying down:
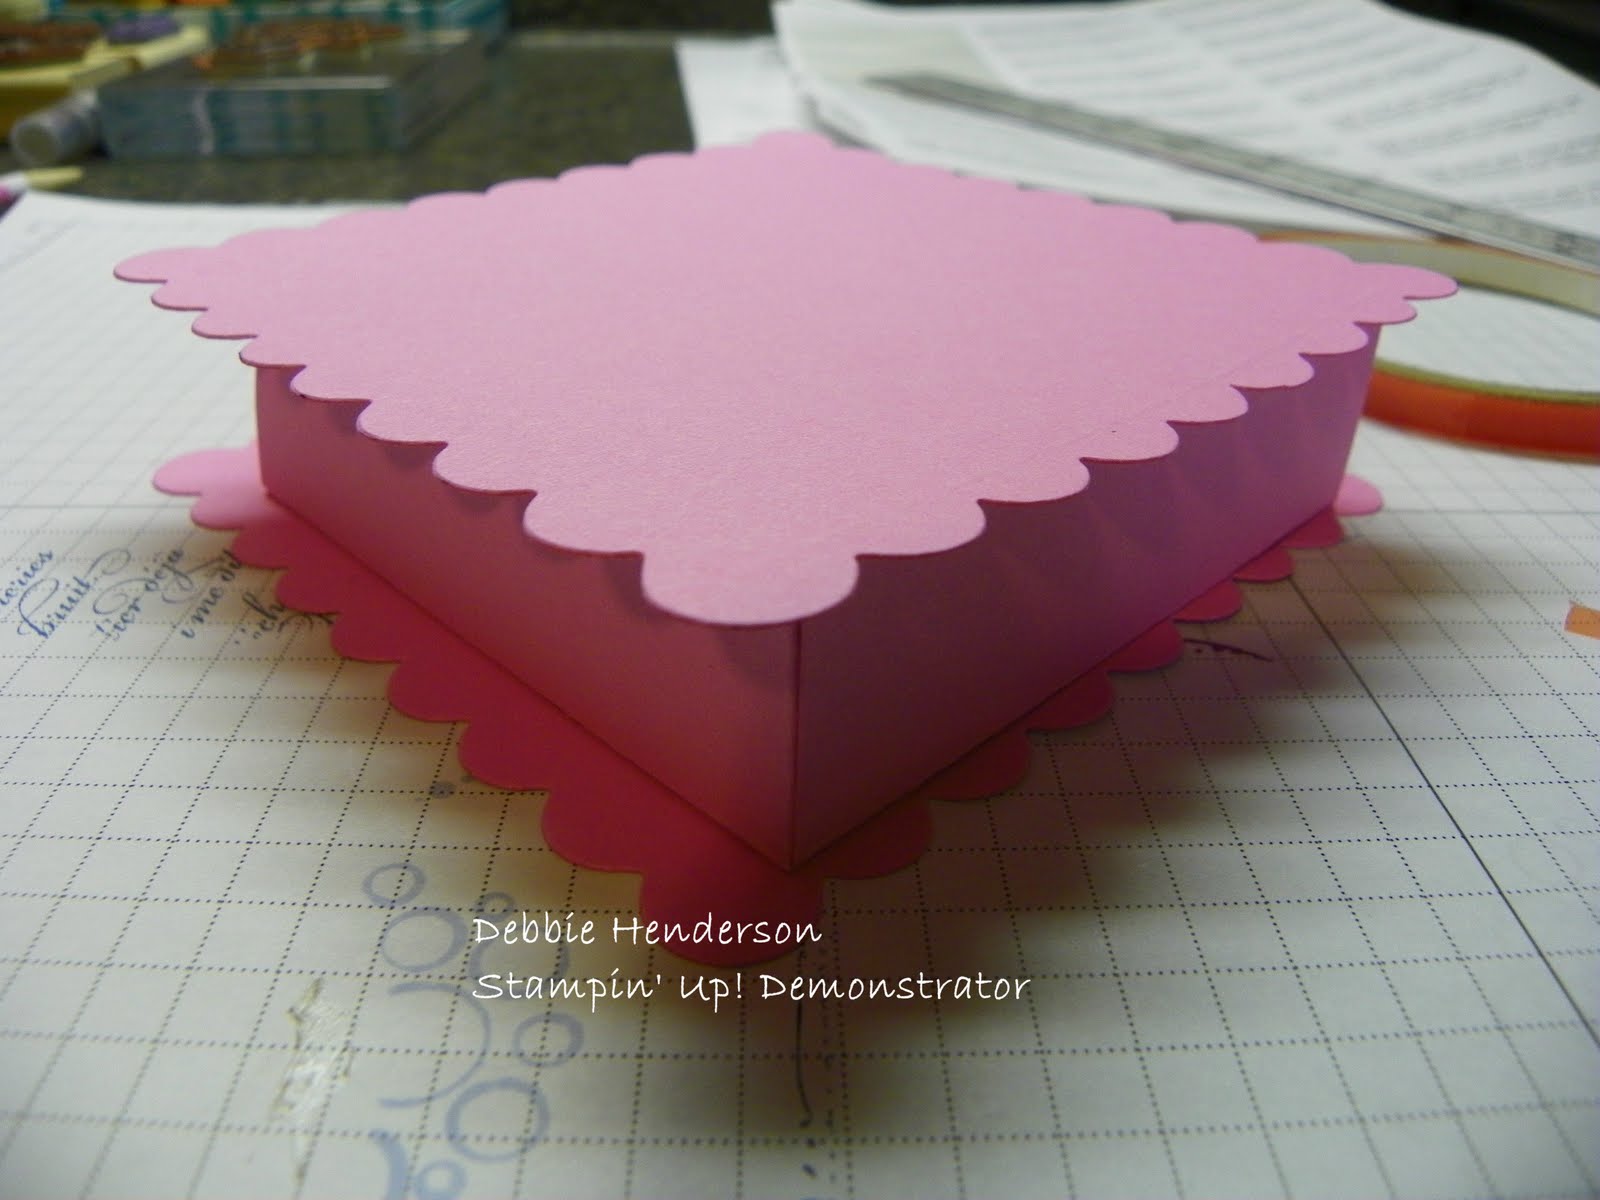 *Now we are ready to add layers. The second layer is created with "Sahara Sand" cardstock and cut at 4" x 4". Glue to your box layer.
 *The third layer is cut at 3.5" x 3.5" in "Whisper White" cardstock. Adhere to layer #2.
*For the 4th layer, I used the Designer Series Paper from the "Summer Mini" called "Island Oasis". I sized it at 3.25" x 3.25" and using the Scallop Trim Border Punch, punch all 4 corners of your Designer Series Paper.

*Glue to your 3rd layer.
 *Now we will be creating the flowers and leaves below to decorate our box front:
 *For the flowers and leaves I used the "Stampin' Up! Island Floral Bigz Die"-Item #118871 available in the "Summer Mini Catalog". Once I had all of my images cut out using scrap pieces of cardstock (3 flowers & 2 leaves), I ran them all through the "Big Shot" using the "Perfect Polka Dots Impressions Folder".
*Glue them all in place using "Mini Glue Dots".
*I then added a little flower in the center of each flower that I punched using the "Itty Bitty Shapes Punch Pack" also sold in the "Summer Mini"-Item #118309 (3-Pack of Punches).
 *Now it's time to create fake string for my "Bitty Buttons"-Item #118761. (These assorted buttons all co-ordinate with the punch shapes). For my string, I sliced a very thin piece of cardstock to match each flower. Using your paper cutter, cut the cardstock as thin as you can and allow room for tying. Mine were about 3 inches long. Carefully thread the cardstock into your button and tie one knot.
 *Using Tombow glue, add a small dab of glue to the top of each knot. I like using Tombow because it dries clear. The glue will also secure your knot in place.
 *Using "Mini Glue Dots", adhere each buttom to each small flower, matching the fake thread to each flower.
 *Now for the sentiment. I used the Just For You sentiment from the "Oval All" stamp set, inked in "Old Olive and cut with my "Large Oval Punch" on "Whisper White" cardstock. I then punched the second layer with my "Scallop Oval Punch". I layered the top piece using "Stampin' Dimensionals" to pop it up on the 2nd layer and adhered to my box.
 *This is the side view of the completed box. You can also add a ribbon or a 1" piece of cardstock to the sides to make a handle if desired.

*3-D view of Scallop Square Box.
 *Now it's time to create fake string for my "Bitty Buttons"-Item #118761. (These assorted buttons all co-ordinate with the punch shapes). For my string, I sliced a very thin piece of cardstock to match each flower. Using your paper cutter, cut the cardstock as thin as you can and allow room for tying. Mine were about 3 inches long. Carefully thread the cardstock into your button and tie one knot.
 *Using Tombow glue, add a small dab of glue to the top of each knot. I like using Tombow because it dries clear. The glue will also secure your knot in place.
 *Using "Mini Glue Dots", adhere each buttom to each small flower, matching the fake thread to each flower.
 *Now for the sentiment. I used the Just For You sentiment from the "Oval All" stamp set, inked in "Old Olive and cut with my "Large Oval Punch" on "Whisper White" cardstock. I then punched the second layer with my "Scallop Oval Punch". I layered the top piece using "Stampin' Dimensionals" to pop it up on the 2nd layer and adhered to my box.
  *This is the side view of the completed box. You can also add a ribbon or a 1" piece of cardstock to the sides to make a handle if desired.
*3-D view of Scallop Square Box.
- My Information:
- Debbie Henderson
- Stampin' Up! Demonstrator
- deb_henderson@hotmail.com
- Shop 24/7: http://www.stampinup.net/esuite/home/debbiehenderson/


Không có nhận xét nào
Đăng nhận xét